This guide explains how to use Smart Search to perform advanced, custom queries on any supported Open Data or Layer dataset you incorporate into your project. Smart Search enhances the precision, speed, and overall effectiveness of retrieving data for the Smart Site Plan Platform. By constructing a query with our intuitive GUI, users can instantly view and download tailored data directly onto the map. This feature is available for Team Subscriptions or higher.
Navigating to Smart Search
You can access Smart Search from several convenient locations. This functionality automatically appears when you have an enabled data source that supports querying.
- Beside the Search Bar on the Smart Site Plan interface.

- A layer that is turned in the Layer’s section.

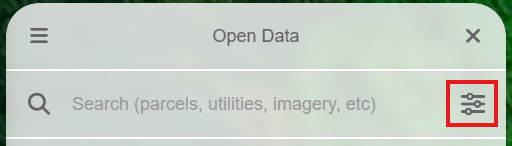
- At the top of the Open Data container.
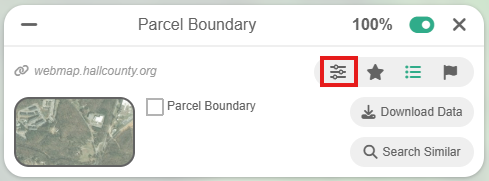
- Within a selected dataset‘s container. Clicking Smart Search here immediately activates querying for that specific source.
Context Title / Menu
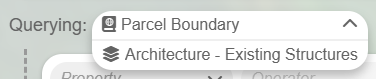
At the top of the Smart Search panel, the Context Title identifies the active data source. For Open Data sources, a book icon appears to the left of the title, while for Layers, a stacked icon is displayed. If multiple sources are active and supported, a Context Menu will appear to facilitate a quick switch between them.
- Context Title displays the name of the active data source.
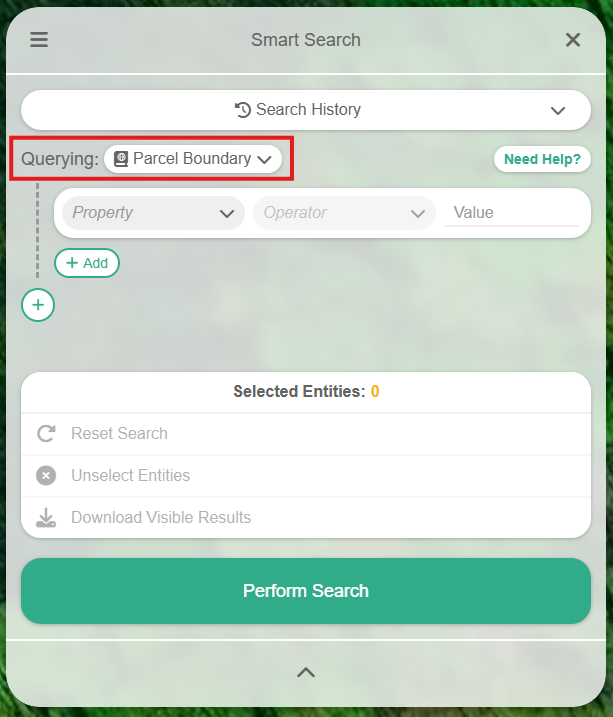
- Context Menu allows you to rapidly change between Smart Search sources.
Query Builder
This feature provides an intelligent and customizable query creator for discovering and downloading precise data onto the map. The following instructions will guide you through its key functionalities.
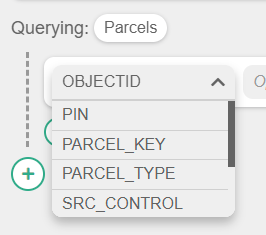
- Select a Property from the dropdown. The available options adjust dynamically based on the active data source.
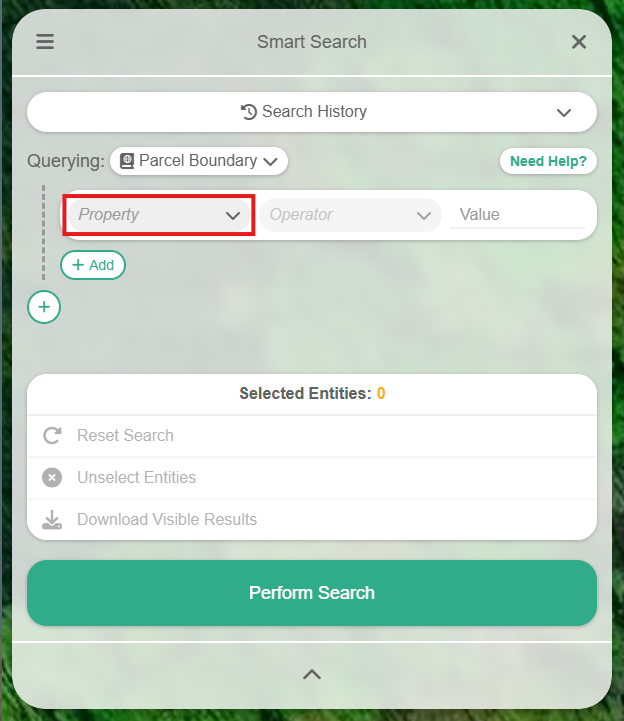
- For example, if OBJECTID is chosen as the property, appropriate numeric operators will appear.
- Note: Choosing properties like Shape Area or Shape Length may offer an additional unit option, if supported by the data source.
- Select an Operator for your query. Operators adjust based on the data type of the property. Text fields support operators such as Equal to, Not equal to, Contains, Not contains, Starts with, and Ends with. Numeric fields offer options like Equal to, Not equal to, At least, At most, Greater than, and Less than.
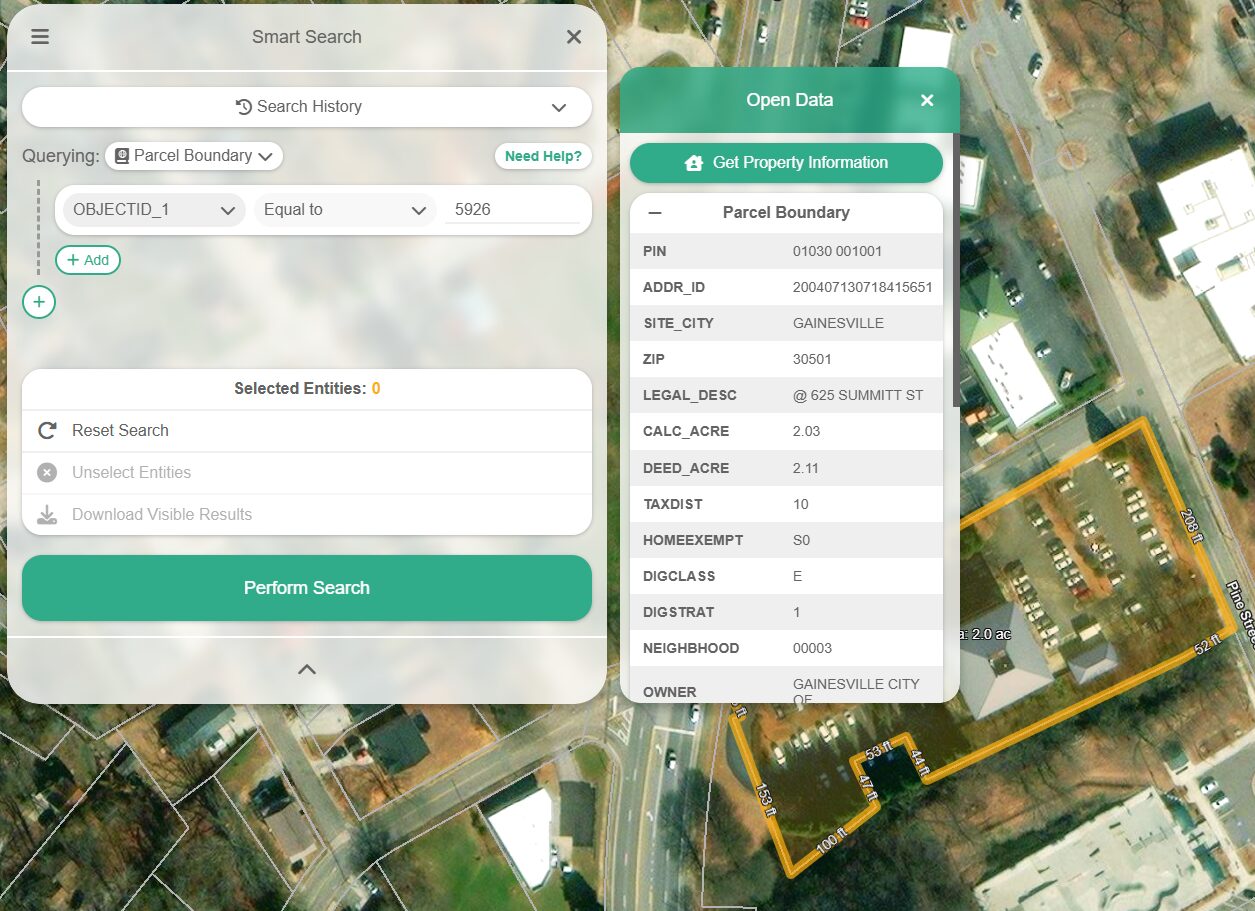
- Enter the value for your selected property. You can click on an entity on the map to reveal its queryable property values. For instance, entering 155474 might be used when querying an OBJECTID field.
- To add multiple conditions, click the Add button below the current rule. By default, new rules use the OR condition; click the condition button to switch to AND if needed.
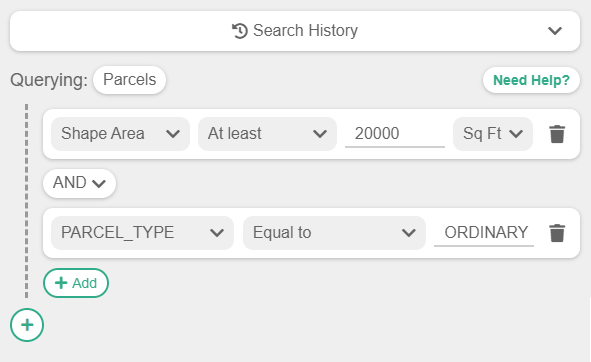
- For example, you could search for records where Shape Area is at least 20,000 Sq Ft and PARCEL_TYPE equals ORDINARY.
- To combine multiple AND conditions with OR conditions, use Groups. Click the + icon at the bottom of the query builder to add a new group (defaulting to OR). Switch the condition to AND if required.
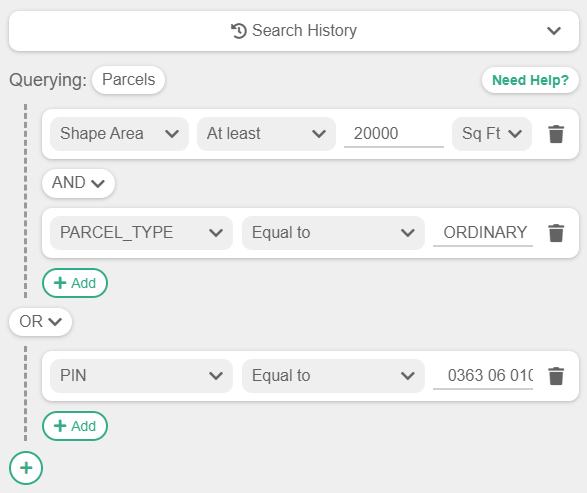
- For example, you might search for (Shape Area at least 20,000 Sq Ft and SITE_CITY contains GAINESVILLE) OR a specific PIN such as 01030 001001.
- After finalizing your query, click Perform Search.
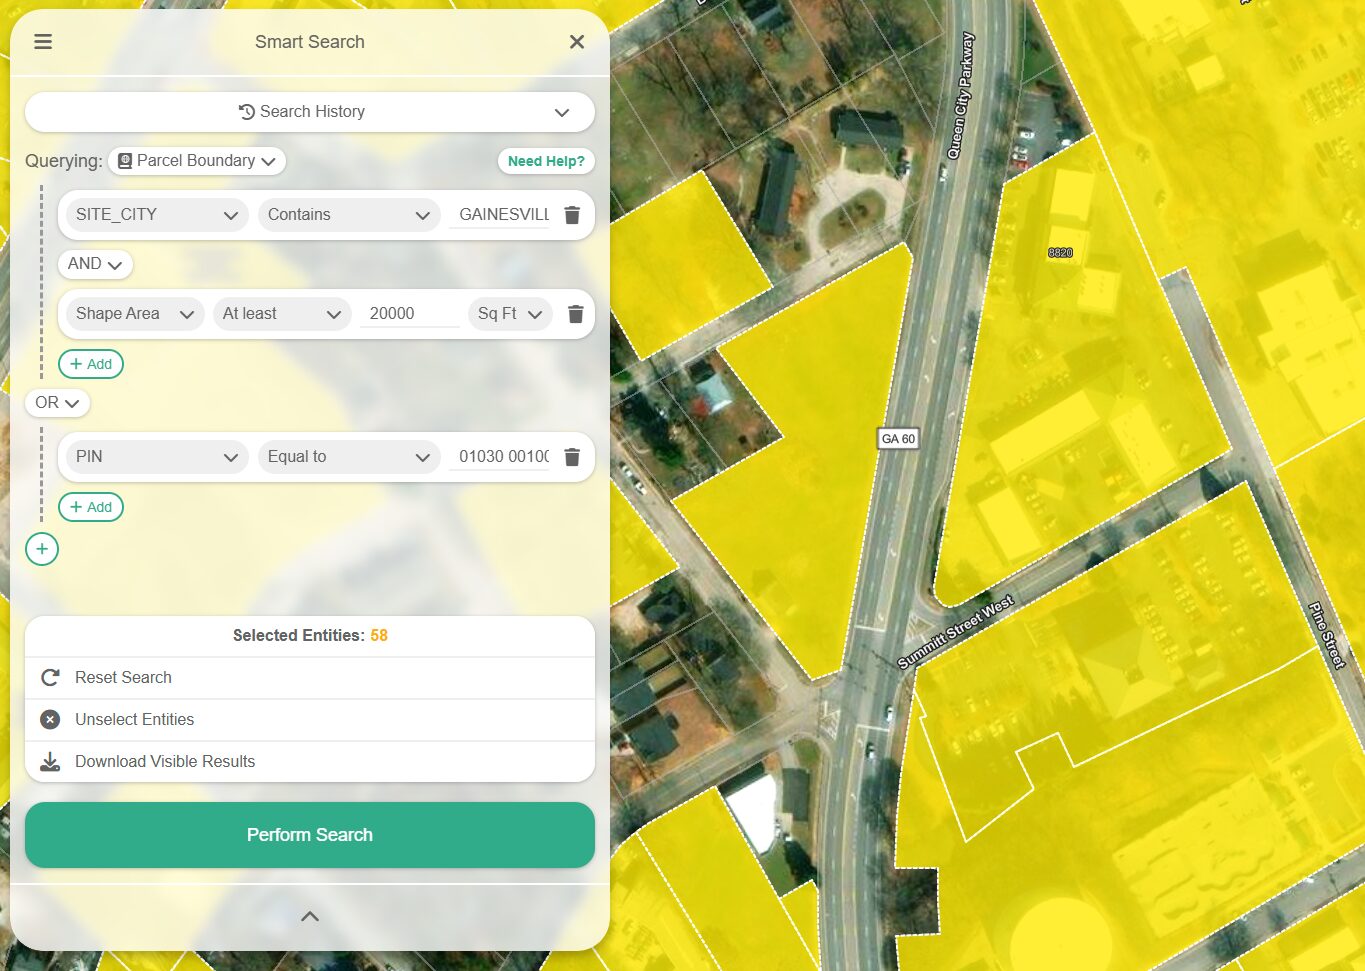
- Matching entities will be highlighted in bright yellow on your map. As you pan or zoom, new yellow entities appear dynamically based on your query.
- To download the displayed entities, refer to the Download Data/Save to Layers section.
Download Data / Save to Layers
Once your query is complete, you can download the resulting data or convert it into a layer for further editing.
- After clicking Perform Search, entities appear on the map. Ensure at least one yellow entity is visible. Only visible entities—classified as Point, Line, or Polygon—are downloadable. Adjust your map extent if necessary.
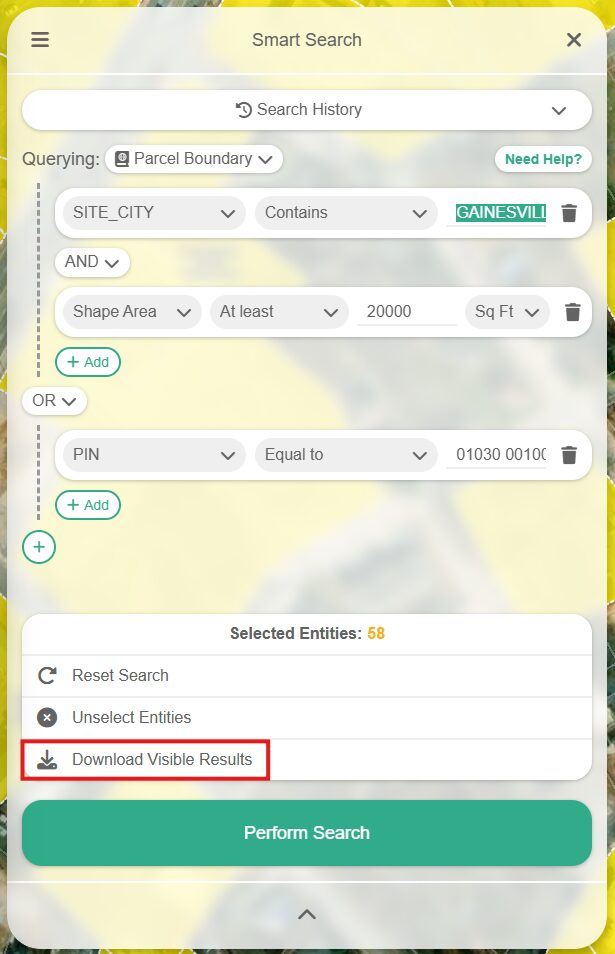
- The displayed count reflects the number of entities available for download, which adjusts as you move the map.
- Click Download Visible Results if you are satisfied with the current selection.
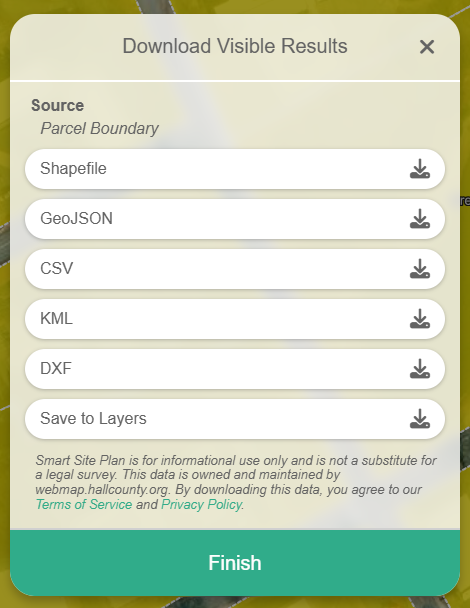
- Select one of the following formats: Shapefile, GeoJSON, CSV, or KML.
- Choose Save to Layers if you prefer to work with the data as a layer rather than a static file. Once saved, the button will change to View in Layers.
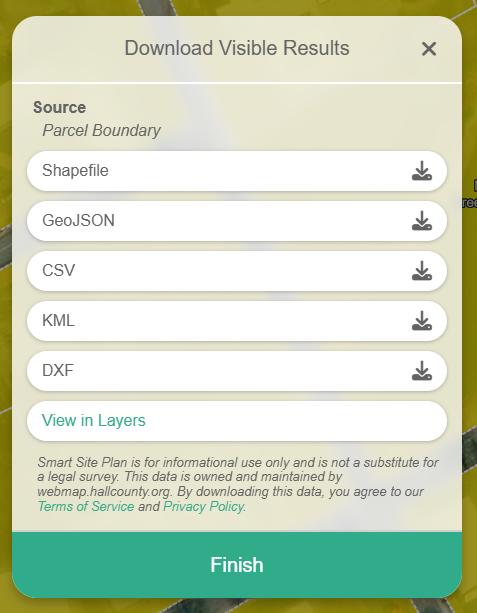
- Clicking View in Layers opens the Layers panel and toggles the new layer containing your queried entities. Additional saves to the same source will merge data into the existing layer, automatically removing duplicate on-screen entities.
Data Management Menu
Deselects all currently selected entities.
Reset Search
Click Reset Search to restore the query builder to its original configuration. 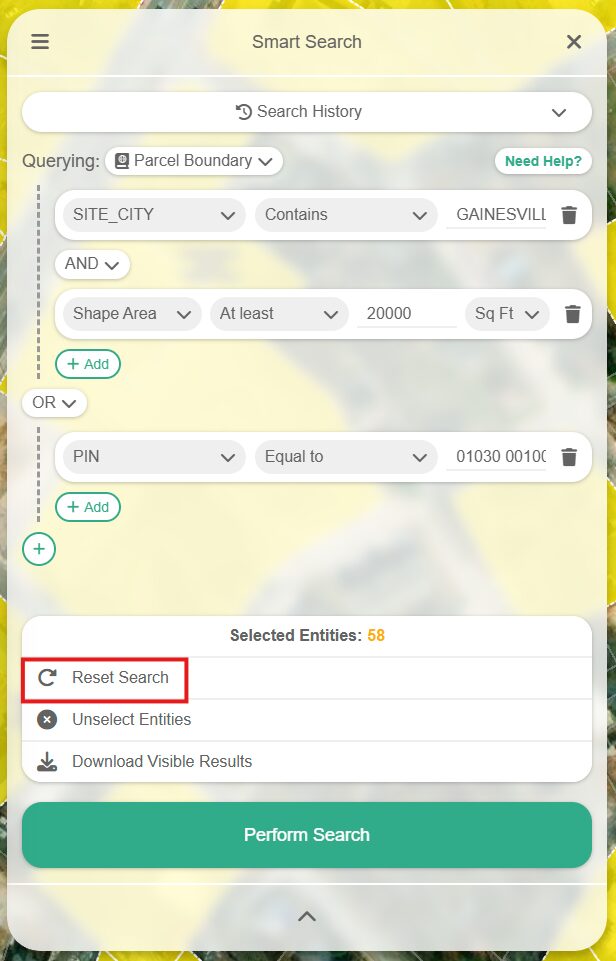
Search History
After executing a search, the Search History panel displays your previous queries. Each entry shows an icon on the left: a book icon for Open Data searches or a stacked icon for Layer-based searches, helping you easily identify the source type. History entries are organized by recent use, and duplicate queries with identical titles and URLs are merged to maintain a clean history.
Operators
Example
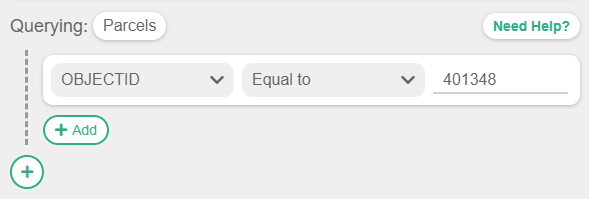
This query retrieves records with an OBJECTID equal to 401348.
Example
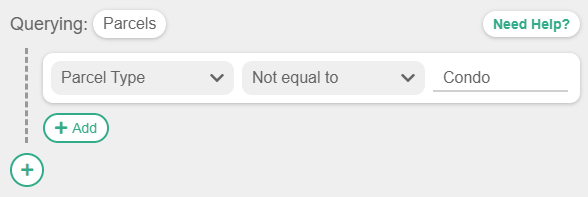
This query excludes records with an OBJECTID of 401348.
Example
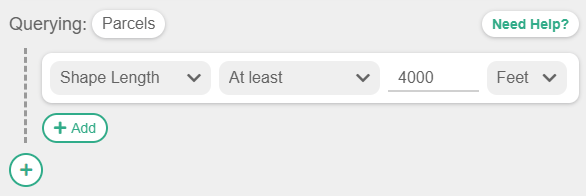
This query finds records with a Shape Length of at least 4000 Feet.
Example
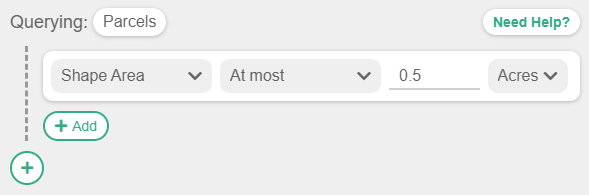
This query locates records with a Shape Area of at most 0.5 Acres.
Example
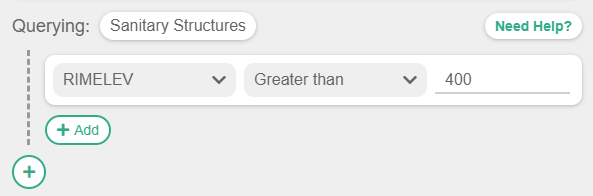
This query selects records with a RIMELEV greater than 400.
Example
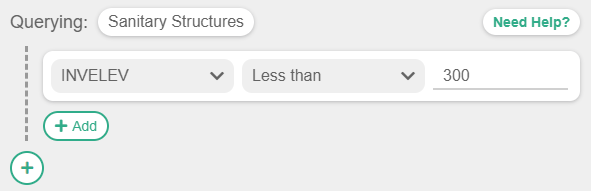
This query selects records with an INVELEV below 300.
Example
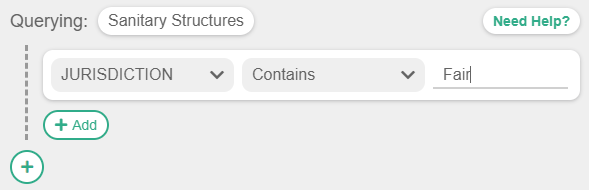
This query selects records where JURISDICTION includes Fair.
Example
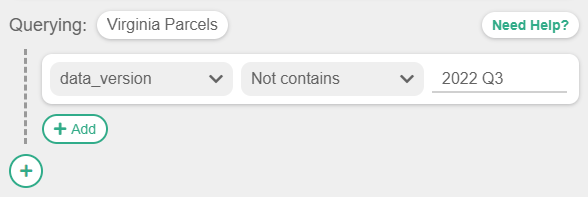
This query excludes records where data_version includes 2022 Q3.
Example
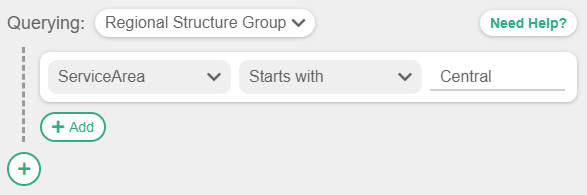
This query retrieves records where ServiceArea starts with Central.
Example
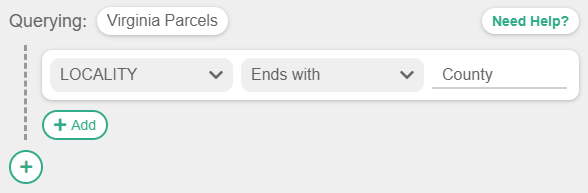
This query retrieves records where LOCALITY ends with County.
“`